A Taste of Home: Dutch Oven Bread Recipe – How to Bake the Perfect Loaf
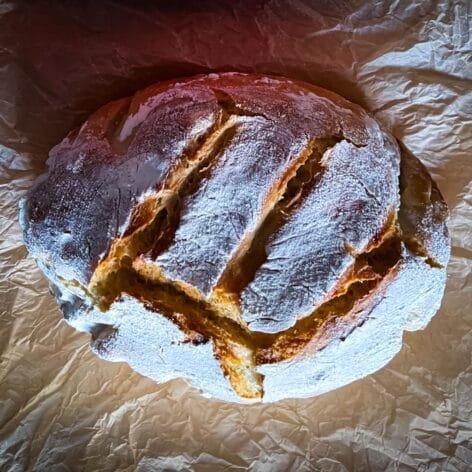
Baking bread at home is a rewarding experience, and this Dutch oven bread recipe is one that truly makes the process both simple and special. With a perfectly crispy crust and soft, airy interior, this loaf is a must-try for anyone who loves the comforting joy of homemade bread.
For me, baking bread is more than just a kitchen activity—it’s a journey back to my roots and the cherished memories of my grandmother. Growing up, I was lucky to live with her, a phenomenal cook and my greatest culinary inspiration. She had an incredible talent for creating hearty meals, but it was her bread-making that left the most lasting impression on me.
I still remember watching her skillfully knead the dough with her hands, humming softly as sunlight streamed through the kitchen window. The warm, inviting aroma of freshly baked bread would fill the house, creating a sense of comfort and love that I carry with me to this day.
This rustic Dutch oven bread recipe is inspired by one of her favorites—a simple yet profound reminder of her care and creativity. Each time I bake it, the crackling crust and its heavenly scent transport me back to those precious moments. It’s more than just a loaf of bread; it’s a piece of home. Let’s dive into the recipe and discover what makes this bread truly special.
Ingredients for the Perfect Dutch Oven Bread
Every ingredient in this bread plays a crucial role, no matter how simple:
- Flour
The backbone of the bread, flour determines the structure and texture. All-purpose flour works wonderfully for this recipe, but bread flour can be used if you prefer a chewier crumb. - Lukewarm Water
The water hydrates the dough, activates the yeast, and contributes to the soft interior texture. The ideal temperature is lukewarm (around 110°F/43°C)—warm enough to activate the yeast but not so hot that it kills it. - Yeast
Yeast is the driving force behind the rise. It ferments the sugars in the flour, releasing carbon dioxide, which causes the dough to expand. Active dry yeast is recommended for this recipe, but instant yeast can be substituted. - Salt
More than a seasoning, salt strengthens the gluten structure, regulates fermentation, and enhances the overall flavor of the bread.
The Art of Kneading
Kneading may seem simple, but it’s a transformative step in bread-making.
- Why Knead?
Kneading develops the gluten structure, which gives the bread its elasticity and ability to trap air. This is what creates a soft crumb and prevents the bread from becoming dense. - Hand Kneading Technique:
Start by mixing the ingredients until a sticky dough forms. Lightly flour your hands and the surface, then fold the dough in half, press it forward with the heel of your hand, and turn it 90 degrees. Repeat this motion for 5-7 minutes. As you knead, the dough will gradually become smoother and less sticky. - Mixer Alternative:
A stand mixer with a dough hook can simplify the process, but kneading by hand provides a tactile connection to the dough, letting you feel its transformation.
Mastering Dough Shaping
Shaping the dough correctly ensures an even rise and a beautiful loaf.
- Folding Technique:
After the first rise, the dough is stretched and folded to build structure. Gently stretch the dough outward, then fold the top and bottom edges to the center. Repeat with the left and right sides. Each fold introduces strength and tension to the dough, improving its ability to rise in the oven. - Forming the Loaf:
After folding, shape the dough into a smooth, cylindrical loaf by tucking the edges underneath. The goal is to create a taut surface that will hold its shape during the second rise and baking. Lightly dust with flour to prevent sticking.
The Role of the Dutch Oven
Using a Dutch Oven is the key to achieving the perfect results in this Dutch oven bread recipe. Its heavy lid traps steam, mimicking the conditions of a professional bakery.
- Why Steam Matters:
Steam keeps the surface of the dough moist during the initial baking phase, allowing it to expand fully before the crust hardens. This results in a beautifully risen loaf with a crackling crust. - Preheating the Dutch Oven:
Placing the Dutch oven in the oven as it preheats ensures the dough gets an immediate burst of heat, which is critical for oven spring (the initial rise during baking).
Scoring the Dough
Scoring isn’t just decorative; it’s functional.
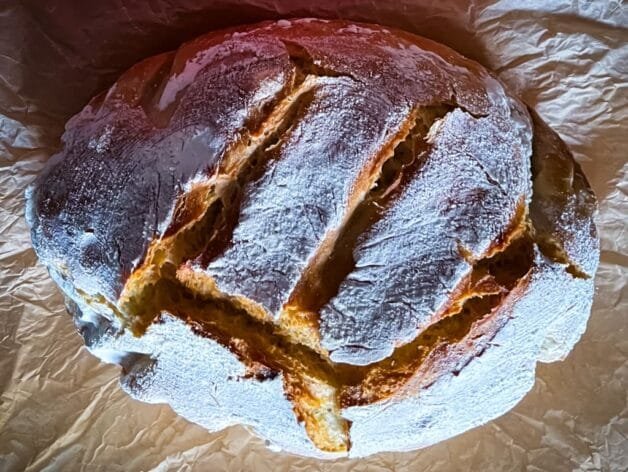
Why Score? It directs the expansion of the bread, preventing it from bursting unpredictably during baking. Use a sharp knife or razor blade to make a quick, confident slash across the top of the dough.
Baking Tips
- Covered Baking:
The first 30 minutes of baking with the lid on allows the loaf to rise fully while trapping steam for a moist interior. - Uncovered Baking:
Removing the lid for the final 20 minutes lets the crust develop a deep golden-brown color and a satisfying crunch.
Storage Tips to Keep Your Bread Fresh
Properly storing your bread ensures it stays delicious for days. For a crusty exterior, keep the bread in a paper bag or wrap it in a clean kitchen towel. This method allows the bread to breathe while maintaining its crisp crust. Avoid storing bread in plastic bags unless you prefer a softer crust, as the trapped moisture will soften the outer layer.
If you’re not planning to eat the bread within two days, freezing is the best option. Slice the loaf before freezing so you can easily thaw individual portions as needed. Wrap the slices tightly in plastic wrap and place them in a freezer-safe bag to prevent freezer burn. To enjoy, simply reheat the slices in a toaster or oven, and they’ll taste as fresh as the day you baked them. Avoid refrigerating bread, as it accelerates staling and dries it out.
With these storage tips, you can savor your homemade bread at its best for longer!
Pairing and Enjoying Your Bread
This bread is incredibly versatile. Its crunchy crust and airy crumb make it ideal for dipping into soups and stews, slathering with butter, or transforming into gourmet sandwiches. For a sweet treat, pair a slice with butter, honey, and a sprinkle of sea salt—it’s pure comfort.
Baking bread is a timeless tradition that connects generations. With each loaf, you’ll feel the joy of creating something beautiful from just a handful of ingredients.
Share your results with #FoodieRoam, and let the spirit of homemade bread-making bring a little extra warmth to your home.
Rustic Dutch Oven Bread
A rustic Dutch oven bread with a crispy crust and soft, airy interior, made with simple ingredients and a foolproof method.
- Dutch oven
- Large mixing bowl
- Stand mixer with dough hook
- Proofing basket
- 4 ¾ cups all-purpose flour
- 2 cups + 2 tablespoons lukewarm water (around 110°F)
- 1 teaspoon active dry yeast
- 1 teaspoon salt
- In a large mixing bowl, whisk together the flour, yeast, and salt. Gradually add the warm water, stirring with a spoon until a sticky dough forms. Knead the dough by hand for 5-7 minutes until it becomes smooth and elastic. Alternatively, use a stand mixer with a dough hook for 4-5 minutes.
- Cover the bowl with plastic wrap or a kitchen towel. Place it in a warm spot and let the dough rise for 60-90 minutes, or until it doubles in size.
- Lightly flour a clean surface and turn the dough out onto it. Stretch the dough outward gently, then fold the top and bottom edges toward the center. Repeat with the left and right sides. Perform this folding process 3-4 times to build structure. Shape the dough into a smooth, tight ball by tucking the edges underneath.
Line a bowl or proofing basket with parchment paper and lightly flour it. Place the shaped dough into the prepared bowl, dust the top lightly with flour, and cover it with a kitchen towel. Let it rise for 15-30 minutes while you preheat the oven.
Place a Dutch oven with its lid inside your oven and preheat to 400°F (200°C). Let the Dutch oven heat for at least 30 minutes.
- Carefully lift the dough, parchment paper and all, and place it into the preheated Dutch oven. Optionally, use a sharp knife to score the top of the dough. Cover with the lid and bake for 30 minutes.
Remove the lid, lower the oven temperature to 350°F (180°C), and bake for an additional 20 minutes, or until the crust is golden brown and the bread sounds hollow when tapped.
- Transfer the bread to a wire rack and let it cool completely before slicing. For a crisp crust, cool uncovered; for a softer crust, cover with a kitchen towel while cooling.
Rising times may vary depending on the temperature of your kitchen. In cooler environments, it may take closer to 90 minutes for the first rise. Look for the dough to double in size as your main indicator.
Preheating the Dutch oven is essential for achieving a great crust. It ensures the dough gets an immediate burst of heat, helping the bread rise and develop its signature crust.